Quantcast
Channel: TMS Software
Viewing all 1016 articles
Browse latest View live

Adding the 3rd dimension to TMS WEB Core

$
0
0


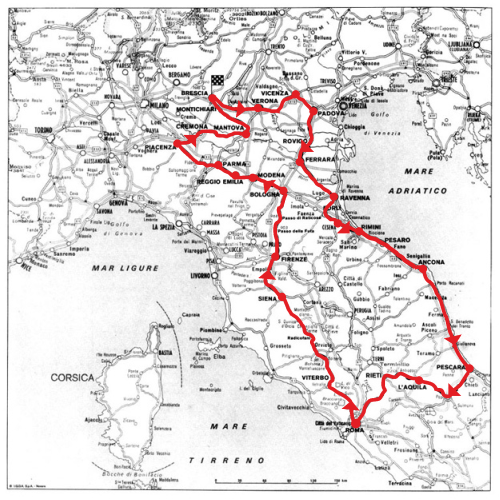
Our team is working hard on the next major release of TMS WEB Core. This will be TMS WEB Core v1.2 Padua. Padua is the next city after Brescia (1.0) and Verona (1.1) on our Mille Miglia race track.

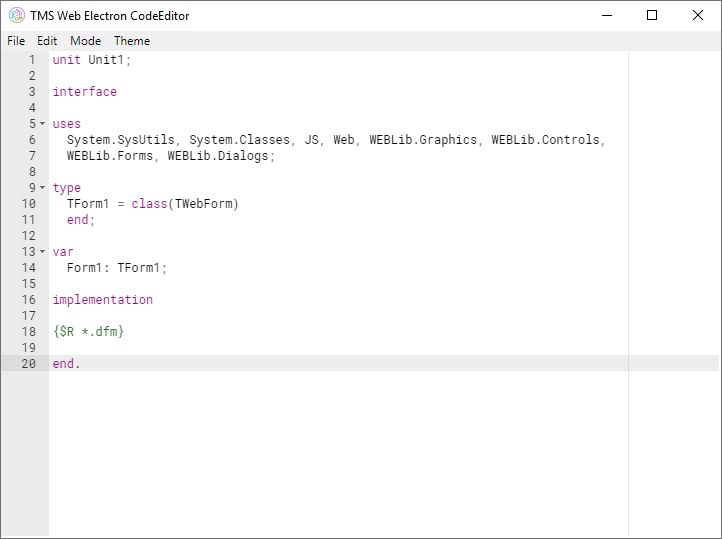
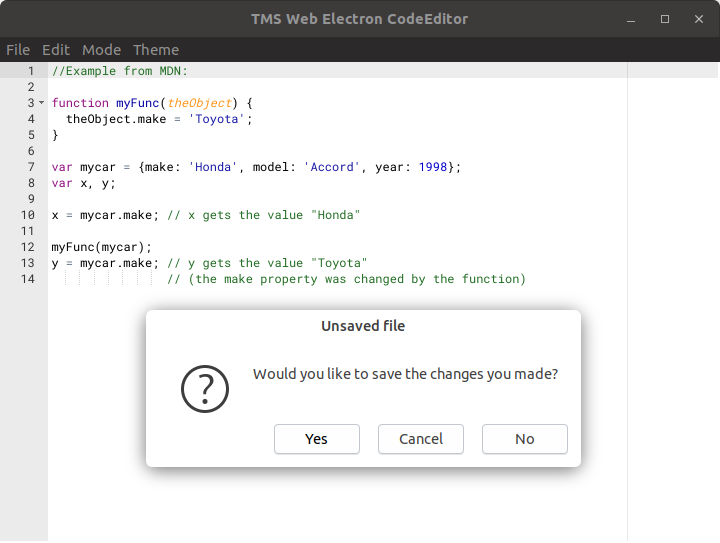
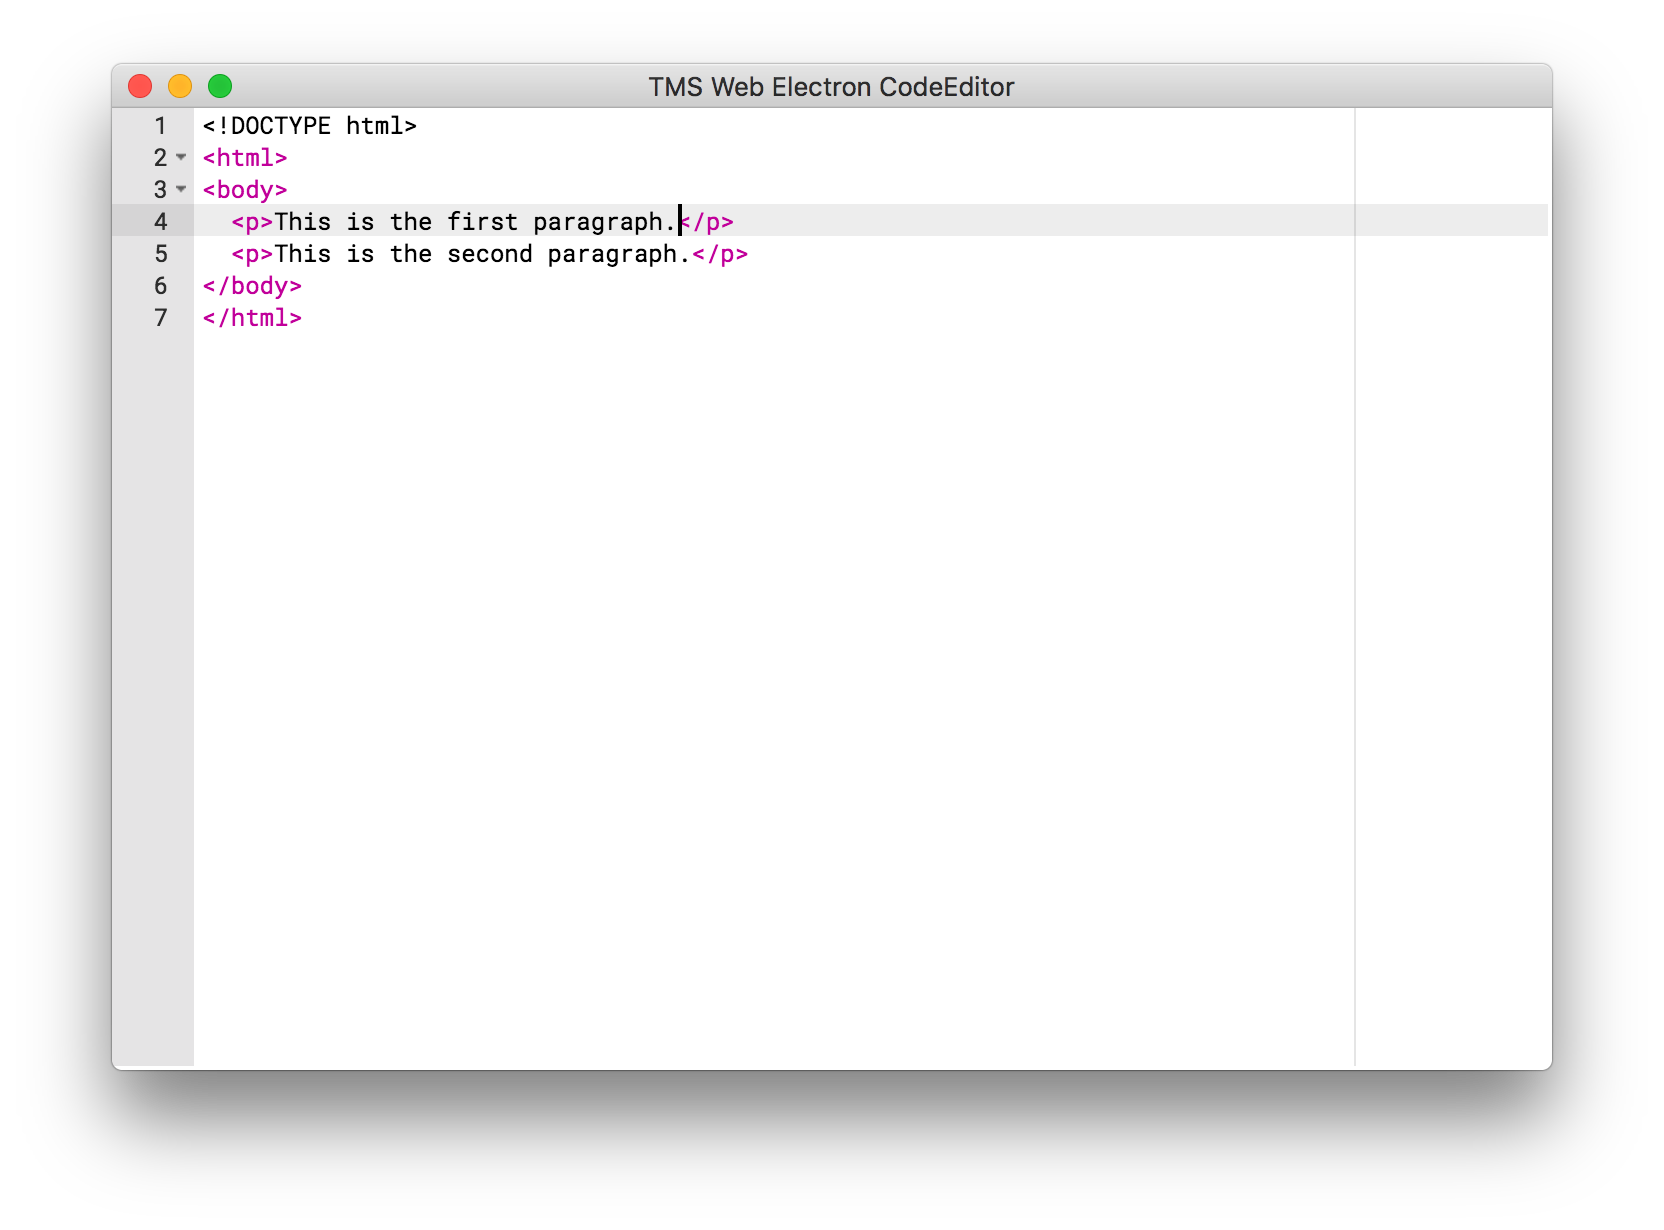
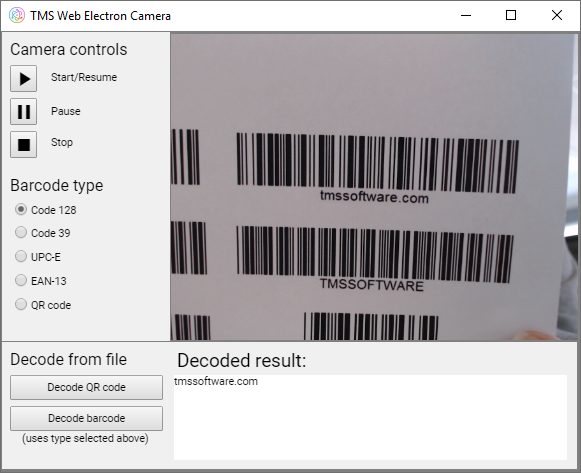
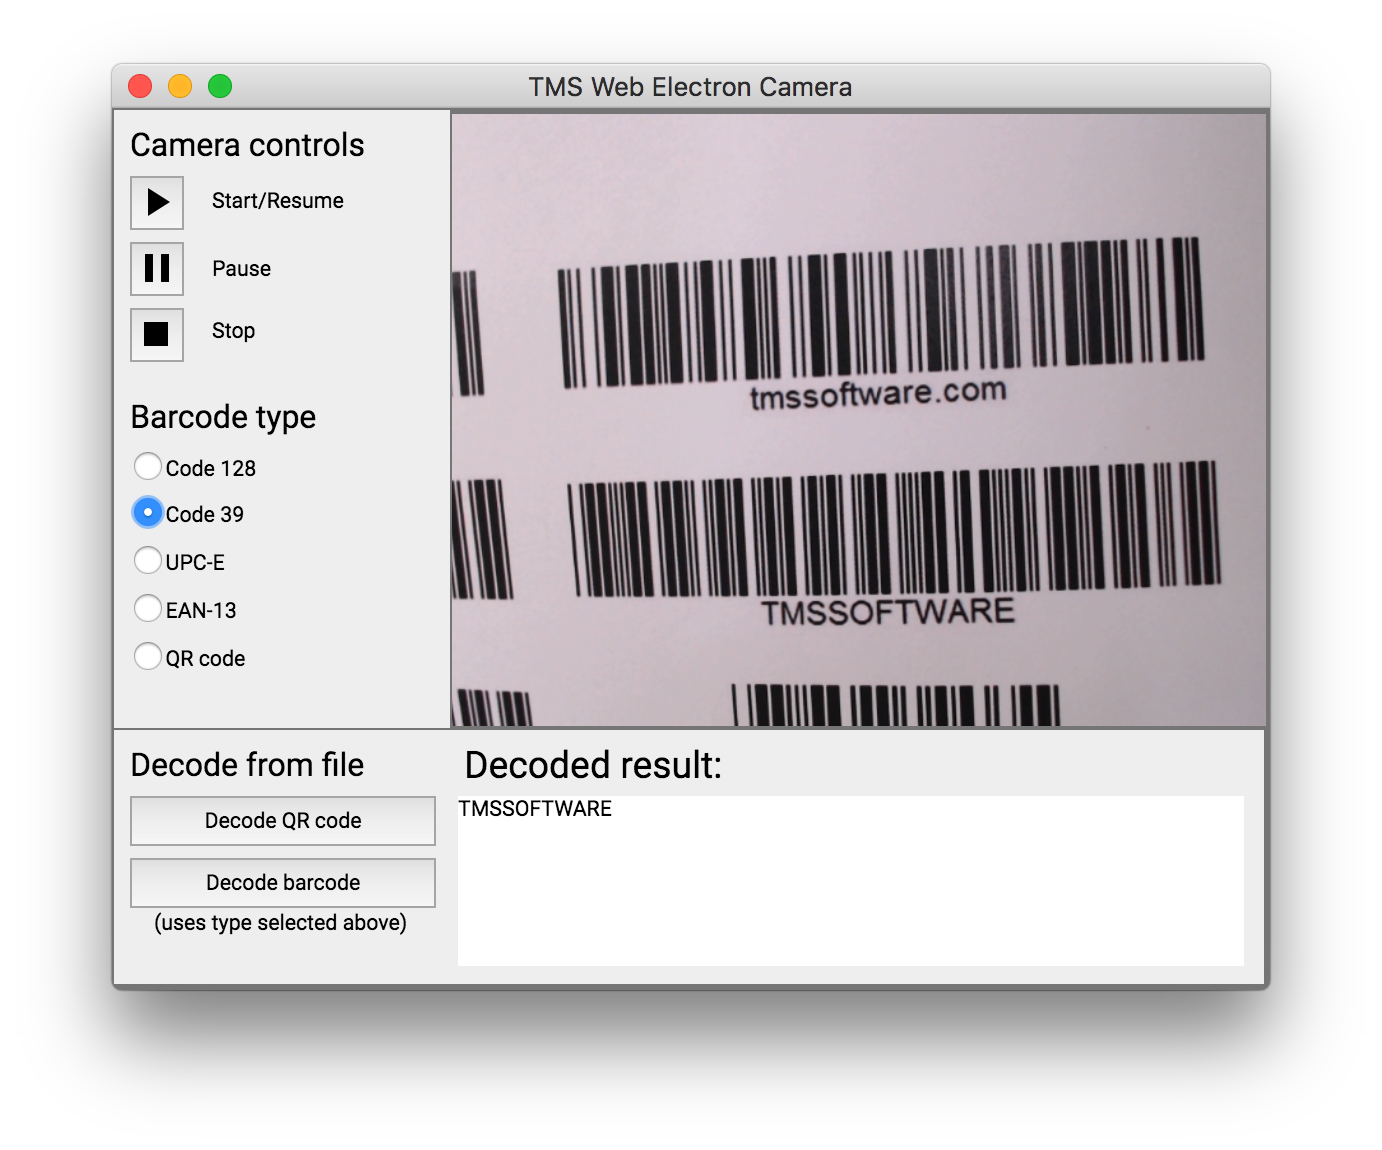
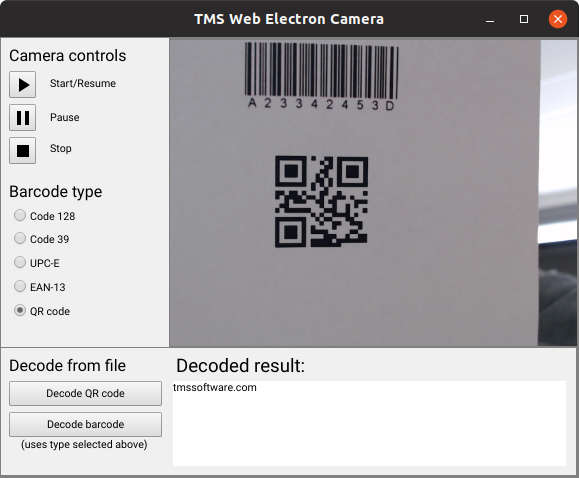
We have shown already a preview of the support for Electron based cross platform desktop apps that will come out of the box with TMS WEB Core v1.2. The new version 1.2 will also come with numerous Object Pascal to JavaScript transpiler enhancements (Pas2JS v1.4) with most importantly the support for anonymous methods. There is a lot more coming that we will unveil in the coming weeks!

With this blog, we wanted to take you to the 3rd dimension that will be added to TMS WEB Core in v1.2, that is the support for 3D graphics based on the amazing WebGL / ThreeJS technology. Thanks to this technology, rendering 3D scenes is fluid and fast right out of any modern browser. This means Chrome, FireFox, Opera, Safari on desktop and on mobile devices.

The WebGL / ThreeJS technology is powerful but it can be quite complex and daunting. Here comes the TMS WEB Core framework with easy usable classes for taking advantage of this technology.

In the upcoming TMS WEB Core this will be exposed via 3 UI controls:

  • TWebThreeJSPaintBox
  • TWebThreeJSChart
  • TWebThreeJSMathChart


Custom 3D scenes with TWebThreeJSPaintBox

The TWebThreeJSPaintBox is a simple 3D scene renderer. Where in a regular 2D PaintBox you do the drawing with lines, rectangles, ... here you can add 3D objects like cube, sphere, cylinder, text, lines, shapes, 3D models ...

Adding a red sphere becomes as simple as:

var
  anObject: TThreeJsObject3D;

begin
  anObject := threeJsPaintBox.addSphere(2, clRed, 10, 8, 4);
  anObject.name := 'sphere1';
  threeJsPaintBox.Invalidate;
end;
This sphere object can now be manipulated or removed again by accessing the object by its name.


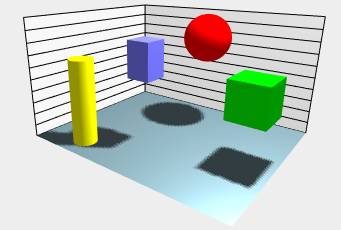
As such, the TWebThreeJSPaintBox allows to create any custom 3D scene easily using the ObjectPascal language.

3D business charts with TWebThreeJSChart

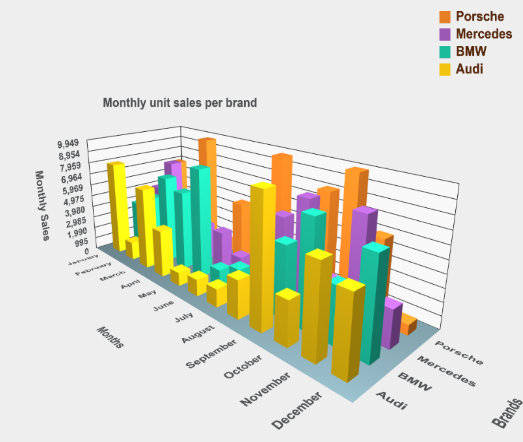
The next 3D control is the TWebThreeJSChart. This is a 3D chart with 3 axes. It allows to add series with their 3D values, select the chart type (bar, cone, line, area, cylinder, scatter) and the TWebThreeJSChart will do all that is necessary to setup the 3D scene to render the chart.

We have created a small & quick demo to demonstrate the power. This 3D chart visualizes the virtual sales results of Germany's leading car manufacturers: Audi, BMW, Mercedes, Porsche. To make the data editable to let users play with the chart, it is displayed in a TWebStringGrid. It shows 4 columns for the sales results for the 4 car manufacturers and 12 months of the year. To configure the 3D chart from the results in the TWebStringGrid, the following code is used:

procedure TForm2.LoadSampleSeries;
var
  aSeries: TThreeJsChartSeries;
  brands: TJSArray;
  months: TJSArray;
  values: TJSArray;
  i,j,v: integer;
begin
  brands := TJSArray.new;
  months := TJSArray.new;

  // create the X-axis for the series filled with the car brand names from the string row header
  for i := WebStringGrid1.ColCount - 1 downto 1 do
    brands.push(WebStringGrid1.Cells[i,0]);

  // create the Y-axis for the series filled with the month names
  for i := 1 to WebStringGrid1.RowCount - 1 do
    months.push(WebStringGrid1.Cells[0,i]);

  // create the series in the 3D chart
  aSeries := TThreeJsChartSeries.Create(brands, months);

  // loop through the normal grid cells to pick the sales values and add these to the series
  for i := WebStringGrid1.ColCount - 1 downto 1 do
  begin
    values := TJSArray.new;
    for j := 1 to WebStringGrid1.RowCount - 1 do
    begin
      v := StrToInt(WebStringGrid1.Cells[i,j]);
      values.push(v);
    end;
    aSeries.addLegendRow(WebStringGrid1.Cells[i,0], values);
  end;

  // set the general 3D chart properties  
  aSeries.AutoMarkValueAxis := true;
  aSeries.valueFormatFloat := '#,##0';
  aSeries.valueAxisFormatFloat := ''; //use the above
  aSeries.Title := 'Monthly unit sales per brand';
  aSeries.ValueAxisTitle := 'Monthly Sales';
  aSeries.LegendAxisTitle := 'Brands';
  aSeries.CategoryAxisTitle := 'Months';
  threeJsChart.Series := aSeries;
end;
It is really as simple as this. Note that you just need to create the data series and it figures out the range of values automatically. It has an Auto range mode that is smart enough to figure out the vertical value range scale and its scale marking automatically based on the minimum and maximum values in data. You can also switch off the Auto range mode and supply your own scale marking when needed.
The code results in the following 3D chart or you can play with it directly from your browser.


Mathematical surfaces with TWebThreeJsMathChart

Finally, the last 3D control is the TWebThreeJsMathChart that is specialized in mathematical surface rendering, both with wireframe and solid surfaces.

TWebThreeJsMathChart is based on a TThreeJsMathChartSeries that is set for the 3D chart and this TThreeJsMathChartSeries implements a callback function that will query the mathematical formula calculation. The setup for the math chart and the X and Y range wherein the result needs to be calculated is set via:

begin
  aSeries := TThreeJsMathChartSeries.Create;
  aSeries.addParametricSurface(-10, +10, -10, +10, resolution, @surfaceCallBack);

  aSeries.Title := '3D Surface';
  aSeries.ZAxisTitle := 'Values';
  aSeries.YAxisTitle := 'Y-axis';
  aSeries.XAxisTitle := 'X-axis';

  threeJSMathChart.Series := aSeries;
end;


As we demonstrate a number of different mathematical functions to visualize in the demo, the callback function is implemented as:

function TForm2.surfaceCallBack(x, y: double): double;
begin
  // the function is selected via the combobox cbSeries
  case cbSeries.ItemIndex of
    1: Result := abs(x-y);
    2: Result := -x*x - y*y + 6;
    3: Result := sin(x)*x+cos(y)*y;
    4: Result := 2 * sqrt(x*x/3 + y*y/8);
    5: Result := sqrt(abs(1.5 * (x*x/3 - y*y/4) - 6));
    6: Result := 8 * (sin(x) + cos(y));
  else
    Result := x*x + y*y;
  end;
end;


It's really nothing more than this before you can start drooling over the wonderful world of 3D mathematical functions.


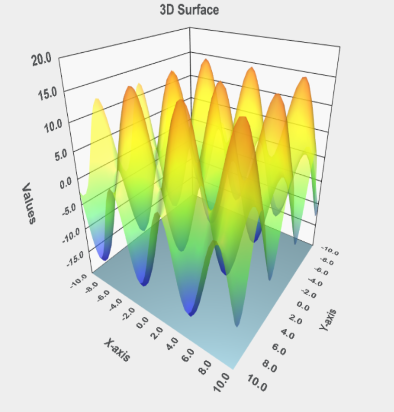
You can see it live from your own browser here.

Get started

Meanwhile, you can go ahead and explore the new & exciting territories of web client development that become available for Delphi developers with TMS WEB Core! You can download the trial version that is generally available, go ahead with the standalone version you purchased or with TMS WEB Core and additional tools that are all included in TMS ALL-ACCESS. Our team looks forward to all your comments, feedback, feature-requests to help steering the development of TMS WEB Core to the next stages!


Syntax highlighting editor coming to TMS WEB Core 1.2 Padua

$
0
0

We have already covered many exciting things that are coming to TMS WEB Core v1.2 Padua such as support for 3D graphics or cross platform desktop applications with Electron, but there is still more to come!
We would like to introduce another addition to you, that we have created from the widely known and used open source Ace editor.


In the new TWebSyntaxMemo component we have exposed a lot of Ace's basic functionalities, like:

  • language/mode setting
  • theme setting
  • numerous editor settings related to gutter, text wrapping, tabs, etc... that are responsible for the look and behavior of the editor
We have also exposed and created editing calls (undo, redo, text replacement and removal, and more) that are accessible programmatically. To provide an easy use to the developers the TWebSyntaxMemo also has properties that you are already familiar and comfortable with (Text, Lines, SelStart...)!

Combining everything that has been mentioned above and what's already available in TMS WEB Core, instead of days of work, you can have your own code editor in a matter of an hour! With very little effort you can create a web application that is capable of loading a file, detecting the opened file's extension and changing the editor's mode on the fly to match the file's type. You can add support for drag and drop functionality through the exposed events too!

TWebSyntaxMemo is going to be available for regular web applications, PWA and Electron applications at the same time! A demo for Electron will be waiting for you in our next release, but if you can't wait to check out the TWebSyntaxMemo in action, then you can already take a look at our demo here.


Access the camera with TMS WEB Core 1.2 Padua

$
0
0

In the past two weeks we have given some insight on the upcoming support for 3D graphics and a new syntax highlighting editor, and we have promised that there will be more to come to TMS WEB Core v1.2 Padua. It's time to continue with some more new components: TWebCamera, TWebQRDecoder and TWebBarcodeDecoder.

The TWebCamera is based on the MediaDevices.getUserMedia() API. It provides an easy access to the users' web camera via the exposed and implemented methods, properties and events. The TWebQRDecoder and TWebBarcodeDecoder components are using the external jsQR and quaggaJS JavaScript libraries. As you have probably already guessed from the name, they are capable of decoding QR codes and barcodes of different types. Let's take a look at a quick and simple example with the TWebQRDecoder.

Example

We would like to access a camera that we can use to decode QR codes. It might seem like a complicated task at first glance, but it only takes a minute and two lines of codes to achieve this!

First drop the needed components onto the form: a TWebCamera, a TWebQRDecoder and a TWebMemo to show the results (and don't forget to add the needed external library to the project!). Then assign the TWebCamera component to the TWebQRDecoder.Camera property. Now that they are connected, as a next step, set the TWebQRDecoder.EnableTimer property to True. With that enabled, the decoder will try to get and decode images from the assigned camera.
Let's start the camera in the form's OnCreate event:

procedure TForm1.WebFormCreate(Sender: TObject);
begin
  WebCamera1.Start;
end;
That was one line of code above, so what's left is retrieving the result from the decoder. Luckily we have an OnDecoded event that we can use:
procedure TForm1.WebQRDecoder1Decoded(Sender: TObject; ADecoded: string);
begin
  WebMemo1.Text := ADecoded;
end;
And this is it. With this second line of code our basic QR code reading application is ready, and it really only took a minute!


If you would like to see and play with it already, then you can check out our demo here, which includes decoding using the TWebBarcodeDecoder too!
And of course we have also tried these new components against our new and upcoming TMS Web Electron Application which allows to create desktop Windows, macOS and Linux applications from a single source code base:


Get started

Meanwhile, you can go ahead and explore the new & exciting territories of web client development that become available for Delphi developers with TMS WEB Core! You can download the trial version that is generally available, go ahead with the standalone version you purchased or with TMS WEB Core and additional tools that are all included in TMS ALL-ACCESS. Our team looks forward to all your comments, feedback, feature-requests to help steering the development of TMS WEB Core to the next stages!

TMS WEB Core v1.2 Padua beta is here for TMS ALL-ACCESSS users

$
0
0


Our team is working around the clock for the huge update that TMS WEB Core v1.2 is. The combination of the number of improvements and new features is mind-blowing. We thought it was time to give our TMS WEB Core v1.2 Padua beta in your hands so you can not only benefit from the many improvements but also assist with your feedback for the further polishing for the release.

Here is a list of what is improved and new in TMS WEB Core v1.2:


Curious about this new fascinating worlds of possibilities or interested to start using the many improvements in v1.2, login on our website with your credentials. TMS ALL-ACCESS users and TMS WEB Core registered users will find the 1.2 beta download on their user account download page.

Our team looks very much forward to your feedback. We are very much looking forward to hear about your experience with TMS WEB Core v1.2 Padua beta and to hear what you'd like to see improved for this major release or what you want to see coming in future releases!

TMS FNC Cloud Pack BETA

$
0
0

First BETA!

We are excited to announce the first BETA of the TMS FNC Cloud Pack!

What's included

Included in the first BETA of the TMS FNC Cloud Pack is the ability to create/implement your own service(s). There is a small accompanying guide available after installation, that explains a few of the basics to get started. Additionally, below is a list of some of the many features that are supported in the TMS FNC Cloud Pack.

  • Implement and use your own service(s) built on top of the TMS FNC Cloud Pack core
  • Make GET, POST, PUT, UPDATE, DELETE and PATCH requests
  • Support for multi-part form data via a separate form data builder class
  • Built-in OAuth 2.0 authentication flow
  • Built-in URL encoding, JSON parsing, file to Base64 encoding and many more

Included in the TMS FNC Cloud Pack is a set of ready-to-use services that are listed below.

  • Google Tasks
  • Google Calendar
  • Google Contacts
  • Google Firebase Database
  • Google Drive
  • Google GMail
  • Google Search terms
  • Google Maps address data
  • Google Photos
  • Microsoft Onedrive
  • Outlook Calendar
  • Outlook Contacts
  • Outlook Mail
  • Apple CloudKit
  • DropBox Cloud storage
  • PayPal
  • YouTube
  • Hubic
  • myCloudData.net

We want your feedback!

In this blog post, we already asked you for which service(s) you wish to see an implementation. We already received a lot of feedback, and want to thank you for this. This allows us to continue development in future updates of TMS FNC Cloud Pack. For those that didn't yet fill in the survey, please go to https://www.survio.com/survey/d/N4J9X1C8L4V7K1U7V

We want your feedback, so we can improve the TMS FNC Cloud Pack even more, so we want to ask you for a thorough testing on TMS FNC Cloud Pack and provide us with any feedback, comments, suggestions and issues you experience. This can be done via comments on this blog, or an email to support@tmssoftware.com

How to get access to the BETA version?

The BETA version is available to all active registered users of the TMS ALL ACCESS. The BETA download link should be available after logging in, and going to the My Products page. Alternatively, the subscription manager should also list TMS FNC Cloud Pack as a registered download.

New features in TMS Analytics & Physics 2.8

$
0
0

The previous version 2.7 of TMS Analytics & Physics library introduced the capability of converting formula and units of measurements to the TeX format. The TeX representation allows then drawing formula in natural math form, using some external tools, such as MathJax.
The new version 2.8 provides some improvements of formula conversion and includes new capabilities. The main new feature is converting standard functions to math operators. For example, exponent function ‘exp(x)’ can be converted to the form of power operation as ‘ex’. The following standard functions supported: sqrt, root, pow, abs and exp. The option of converting functions to the operation format can be on or off, allowing different representation of the formula.
Let us consider the following formula, containing several standard functions ‘sqrt(x^2-1)+root{3*n}(x/2)*abs(x-A)-exp(x^2)*pow{n/2}(x+1)’. This formula can be converted to the TeX format in two different ways: with or without converting functions to the operation format. Here is the formula drawing for these two cases:

  • without function conversion:

  • with function conversion:


Another improvement is new simplifications of math expressions. Simplifying math expressions allows better representation of math data. Simplified formula is more suitable for reading and perception. For example, the expression simplification implicitly used after symbolic derivative calculation, because this can significantly reduce the result. For example, let us consider the following formula:


Evaluating symbolic derivatives for the expression, we can get two results. The first result evaluated using formal recursive chain algorithm without simplifications:


Next formula is the same expression after simplification:


The last version 2.8 of the library supports the following simplification algorithms:
  • Expanding nested sum, product and power expressions
  • Collecting constant addends in sum expressions
  • Reducing addends in sum expressions
  • Combining constant multipliers in product expressions
  • Reducing multipliers in fraction expressions
  • Combining power expressions with multipliers
  • Simplifying integer square roots and modulus of negative data


The expression simplification can be used explicitly in the code, calling the ‘Simplify’ method of the ‘TTranslator’ class. Here is an example of the formula simplification demonstrating the algorithms: Initial formula:


Simplified formula:


TMS Analytics & Physics 2.8 is already available.

Video: Developing a Database-driven Web Application with Delphi Rio and TMS Web Core

$
0
0

Delphi is the number one tool for developing Desktop applications on and for Windows. There is little opposition to this statement. A couple of years ago, the compiler for 64-Bit Windows was also released. Having the VCL at your mercy and extensive database connectivity included in the product, Delphi is also at the top whenever databases come into the mix. However, Delphi never has become known as the front-runner for Web Application development. Even though components to access the web and a web framework come with the product, for many Delphi and Web Development are never mentioned in the same train of thought.

Winter Change is here


TMS Software changed the game plan in 2017 by introducing TMS Web Core as their new framework to develop web applications. You can find a lot of information about this framework on the internet. Simply start your journey at the following web page and you will find videos, articles and event dates to learn more about it:


Since its introduction in 2017, TMS has added many features and components to the framework. At this time it is even possible to develop Progressive Web Apps (PWA) and multi-platform desktop (!) applications using the Electron framework.

Practical examples


Some developers say that practical and realistic examples are more important than marketing material. This is where I came in to produce videos that show how to use TMS Web Core for certain development tasks.

I wanted to build a tutorial series that abides by the following guidelines:
  • Data taken from a real, active data source/database that is still being maintained
  • Demos should be reproducible and easily accessible, including the data that is being used
  • Build it all from scratch and start with a very simple example
  • Further, more complicated tutorials will be based on the foundation

Today, I would like to introduce the so-called ‘School Data Series’ – School Series in short. It follows those guidelines exactly. I used a database published by the administration of Lee County, Florida in the US. The data lists all the schools (e.g. public elementary, middle and high-schools) in the county with many attributes:


As you can see in the screenshot, it is possible to download the data and import it into a database.

This will be the starting point for the tutorial.

Video 1: Connect to database, access from Web App


The first video introduces the content and will also give a brief overview where the series will be going in later parts. However, the focus is on the question how to connect to the data from a web application. Delphi developers usually can use a connection, query and a grid to display data from a database. To the surprise of most people that do not know about TMS Web Core, this is exactly how it works in TMS Web Core. The only hurdle you will have to tackle is the fact that the connection requires another layer between the application and the database server. This layer consists of a web service that provides REST access to the database. The tutorial will give you all the arguments why this approach makes sense and the approach without a web service is not to be considered.


This will be covered:
  • Introduction to the video series
  • Get to know the data
  • Build a REST web service with JSON support using TMS XData
  • Build a TMS Web Core application with
    • connecting to the web service
    • using database connections and datasets during design-time
    • display all data in a grid
  • Outlook on other parts of the series
    • adding data from the database to Google Maps
    • display charts based on the info from the database with Google Charts
    • add professional web design using Bootstrap

I will follow up with further blog posts about all the parts of the series.

The complete series will always be available in a handy playlist on YouTube here:


Video: Creating a database-driven, interactive Google Maps web application with Delphi Rio

$
0
0

Part 2 of the School Data Video Series shows you how to write a web application that offers an interactive Google Map with data that is taken from a database. In order to access the database it uses the REST web service that was built in part 1.

The video shows by giving easy to follow step-by-step instructions:

  • Getting to know the data in the database
  • Build REST queries in the web browser
  • Implement a TMS Web Core application
    • Access the REST web service
    • Request data
    • Add markers to the Google Map component
    • Use a special, pre-defined icon for the marker


Here’s a little teaser what the app will look like in the end:

The video is part of the playlist, but here’s a direct link to part 2:


Adding web design with Bootstrap 4 to a TMS Web Core application

$
0
0

Another video in the School Data Series adds professional modern web design to the web application that was built in the previous video. It is a common misconception that the form designer restricts the design capabilities of web frameworks built with Delphi. Giving a practical example will make it very easy for you to build your own projects with web design. You will also know how to include web designers into the development process of your web applications.

You will see how to transform this form…

…into this form:


To sum up the complete contents of the video:

  • Review of what has been developed so far
  • Replace Google Maps API marker with custom icon
  • Build a mockup for the design in Adobe Photoshop
  • Transfer the design into HTML with Adobe Dreamweaver
  • Add the web design to your existing project
  • Link TMS Web Core components to the new web design

You can find the video right here:


The TMS WebGMaps v3.1 update includes map styles and SVG markers

$
0
0

We're pleased to announce TMS WebGMaps v3.1 has been released today. TMS VCL WebGMaps is our component for VCL development that exposes a myriad of geographical functions for integration in Delphi or C++Builder Windows applications while TMS FMX WebGMaps offers the same functionality for cross-platform FireMonkey applications on Windows, Mac, iOS and Android.

In this new version we introduce the functionality to display the map in a custom style. You can use the pre-defined Night Mode style or any other custom style.


The code needed for this is just one line of code:

    WebGMaps1.MapOptions.MapStyle := mstNightMode; 


The code needed for this is just two lines of code:

  WebGMaps1.MapOptions.CustomStyle.Text := '[JSON Object]';
  WebGMaps1.MapOptions.MapStyle := mstCustom;

Use the Google Maps Platform Styling Wizard as a quick way to generate your own JSON styling object.


Another new feature are SVG Markers. This technique allows to display markers with a custom shape based on a SVG path. Several pre-defined shapes are available as well as the possibility to add your own custom SVG path.


Adding markers with a custom shape is very easy as this code snippet shows:

var
  m: TMarker;
begin
  m := WebGMaps1.Markers.Add(WebGMaps1.MapOptions.DefaultLatitude, WebGMaps1.MapOptions.DefaultLongitude);
  m.Shape := msStar;
  m.ShapeColor := clYellow;
  m.ShapeScale := 2;
  WebGMaps1.UpdateMapMarker(m);

  m := WebGMaps1.Markers.Add(WebGMaps1.MapOptions.DefaultLatitude + 0.1, WebGMaps1.MapOptions.DefaultLongitude - 0.1);
  m.Shape := msStar;
  m.ShapeColor := clYellow;
  WebGMaps1.UpdateMapMarker(m);

  m := WebGMaps1.Markers.Add(WebGMaps1.MapOptions.DefaultLatitude - 0.1, WebGMaps1.MapOptions.DefaultLongitude - 0.1);
  m.Shape := msFavorite;
  WebGMaps1.UpdateMapMarker(m);

  m := WebGMaps1.Markers.Add(WebGMaps1.MapOptions.DefaultLatitude + 0.1, WebGMaps1.MapOptions.DefaultLongitude + 0.1);
  m.Shape := msHome;
  m.ShapeColor := clSkyBlue;
  m.ShapeScale := 2;
  WebGMaps1.UpdateMapMarker(m);
end;

Today's update also includes other smaller new features and improvements.
We look forward to learn about your interesting integrations of TMS WebGMaps in your applications!

Video: Add Google Charts based on a database query to web applications in Delphi Rio

$
0
0


The next videos of the School Data Series tackle the visualization of numbers using Google Charts.
Due to the amount of detail, I decided to split this topic into 3 separate videos.


The end result will look like this:


Student numbers will be grouped by zip code. Users are able to click on the bars and drill-down all the schools in that area (master-detail).

The first video covers:

  • Looking at the database
  • Build the database query for the chart
  • Convert database query into URL
  • Add service method to XData web service for charting

The next video will show you how to build the web application that consumes the data. Finally, the last video adds the user-interaction with the popup-window. Look out for these parts, they will be published soon.

The first video is available here:


TMS FNC Cloud Pack is here!

$
0
0

First release!

We are excited to announce the first release of the TMS FNC Cloud Pack!

What's included

Included in the TMS FNC Cloud Pack is the ability to create/implement your own REST service client(s). There is a small accompanying guide available after installation, that explains a few of the basics to get started. Additionally, below is a list of some of the many features that are supported in the TMS FNC Cloud Pack.

  • Create your own REST service client(s) built on top of the TMS FNC Cloud Pack core
  • One source code base to use on multiple frameworks (FMX, VCL, WEB and LCL)
  • Make GET, POST, PUT, UPDATE, DELETE and PATCH requests
  • Support for multi-part form data via a separate form data builder class
  • Built-in OAuth 2.0 authentication flow
  • Built-in URL encoding, JSON parsing, file to Base64 encoding and many more

Included in the TMS FNC Cloud Pack is a set of ready-to-use REST service client implementations that are listed below.

  • Google Tasks
  • Google Calendar
  • Google Contacts
  • Google Firebase Database
  • Google Drive
  • Google GMail
  • Google Search terms
  • Google Maps address data
  • Google Photos
  • Microsoft Onedrive
  • Outlook Calendar
  • Outlook Contacts
  • Outlook Mail
  • Apple CloudKit
  • DropBox Cloud storage
  • PayPal
  • YouTube
  • Hubic
  • myCloudData.net

How to create your own REST service client?

To illustrate how to create your own REST service client, we take the source code from accessing a Google service, such as Google Drive. Google Drive has a common layer in where the authentication flow and access token generation are handled to allow other services from Google implement the API’s on top of this layer. The first step is to generate the authentication URL.
function TTMSFNCCustomCloudGoogle.GetAuthenticationURL: string;
begin
  Result := InitializeAuthenticationURL(Self);
end;

function InitializeAuthenticationURL(const ACloudBase: TTMSFNCCloudBase): string;
var
  url, sc: string;
begin
  sc := TTMSFNCCloudBaseOpen(ACloudBase).GetScopes('+', True);
  url :=
      '?scope=' + sc
    + '&state=profile'
    + '&redirect_uri='+ TTMSFNCUtils.URLEncode(ACloudBase.Authentication.CallBackURL)
    + '&response_type=code'
    + '&client_id=' + ACloudBase.Authentication.ClientID
    + '&approval_prompt=force'
    + '&access_type=offline'
    + '&hl=en';

  url := 'https://accounts.google.com/o/oauth2/auth' + url;

  Result := url;
end;
The URL is a concatenation of The ClientID, CallBackURL, some default parameters and a set of scopes, which is crucial to allow the user to identify which services is accessing which information. For Google Drive, the scopes are added in the constructor:
  Scopes.Clear;
  Scopes.Add('https://www.googleapis.com/auth/drive');
  Scopes.Add('https://www.googleapis.com/auth/drive.file');
  Scopes.Add('https://www.googleapis.com/auth/userinfo.profile');
When calling the Connect method, and the Access Token is not yet retrieved, or no longer valid, a browser is shown which allows identifying and authorizing the application which is requesting access to your files/folders and account information. Below is a screenshot of the browser and the scopes that are requested via the authorization URL.


After Clicking on the “Allow” button, the Application is redirected back to your application which runs an HTTP Server listening to the Callback URL & Port set via Authentication.CallBackURL. As soon as the HTTP Server catches the OAuth 2.0 redirect callback URL, it parses the URL and generates an authentication token. The next step is to take the authentication token and convert it to an access token:
procedure TTMSFNCCustomCloudGoogle.RetrieveAccessToken;
begin
  InitializeRetrieveAccessTokenRequest(Self);
  ExecuteRequest({$IFDEF LCLWEBLIB}@{$ENDIF}DoRetrieveAccessToken);
end;

procedure InitializeRetrieveAccessTokenRequest(const ACloudBase: TTMSFNCCloudBase);
begin
  ACloudBase.Request.Clear;
  ACloudBase.Request.Name := 'RETRIEVE ACCESS TOKEN';
  ACloudBase.Request.Host := 'https://accounts.google.com';
  ACloudBase.Request.Path := '/o/oauth2/token';
  ACloudBase.Request.Query :=  'client_id=' + ACloudBase.Authentication.ClientID
  + '&client_secret=' + ACloudBase.Authentication.Secret
  + '&redirect_uri=' + ACloudBase.Authentication.CallBackURL
  + '&code=' + ACloudBase.Authentication.AuthenticationToken
  + '&grant_type=authorization_code';
  ACloudBase.Request.Method := rmPOST;
end;
In the access token request, you’ll notice that the secret, authentication token, and callback URL are required to identify your application request and make sure the service returns the correct access token. The request is executed and automatically handled by the core layer in TMS FNC Cloud Pack. There is no need to manually parse the access token, unless the service deviates from the default OAuth 2.0 authentication flow. After retrieving the access token, the service core layer is automatically performing a test to validate the access token and grant access to service API’s. The test needs to be handled by your service implementation. For Google Drive, the test involves calling a simple tokeninfo API endpoint to validate the tokens, but for other services, it could be retrieving the account information, or testing a retrieval of files/folders.
procedure TTMSFNCCustomCloudGoogle.TestTokens(const ATestTokensRequestResultEvent: TTMSFNCCloudBaseRequestResultEvent = nil);
begin
  InitializeTestTokensRequest(Self);
  ExecuteRequest(ATestTokensRequestResultEvent);
end;

procedure InitializeTestTokensRequest(const ACloudBase: TTMSFNCCloudBase);
begin
  ACloudBase.Request.Clear;
  ACloudBase.Request.Name := 'TEST TOKENS';
  ACloudBase.Request.Host := 'https://www.googleapis.com';
  ACloudBase.Request.Path := '/oauth2/v1/tokeninfo';
  ACloudBase.Request.Query := 'access_token=' + ACloudBase.Authentication.AccessToken;
  ACloudBase.Request.Method := rmGET;
end;
After executing the test tokens request, the service returns a JSON response which is unique for each service. For Google Drive, this is checking if the returned JSON does not have an error tag.
function TTMSFNCCustomCloudGoogle.GetTestTokensResult(
  const ARequestResult: TTMSFNCCloudBaseRequestResult): Boolean;
begin
  Result := InitializeTestTokensResult(Self, ARequestResult)
end;

function InitializeTestTokensResult(const ACloudBase: TTMSFNCCloudBase; const ARequestResult: TTMSFNCCloudBaseRequestResult): Boolean;
var
  o: TJSONValue;
  s: string;
begin
  Result := False;
  s := ARequestResult.ResultString;
  if s <> '' then
  begin
    o := TTMSFNCUtils.ParseJSON(s);
    if Assigned(o) then
    begin
      Result := not Assigned(TTMSFNCUtils.GetJSONValue(o, 'error'));
      o.Free;
    end;
  end;
end;
The result is a Boolean (true/false). When the result is a true, the service is successfully authenticated, and the application can start accessing various API’s. Below is a sample that shows how to use the access token to retrieve the account drive space info.
procedure TTMSFNCCustomCloudGoogleDrive.GetAccountInfo;
begin
  Request.Clear;
  Request.Host := Service.BaseURL;
  Request.Path := FBasePath + '/about';
  Request.Query := 'access_token=' + Authentication.AccessToken;
  Request.Method := rmGET;
  Request.Name := 'GET SPACE USAGE';
  ExecuteRequest({$IFDEF LCLWEBLIB}@{$ENDIF}DoRequestGetSpaceUsage);
end;

procedure TTMSFNCCustomCloudGoogleDrive.DoRequestGetSpaceUsage(const ARequestResult: TTMSFNCCloudBaseRequestResult);
var
  o: TJSONValue;
begin
  if ARequestResult.ResultString <> '' then
  begin
    o := TTMSFNCUtils.ParseJSON(ARequestResult.ResultString);

    if Assigned(o) then
    begin
      try
        FInfo.UserName := TTMSFNCUtils.GetJSONProp(o, 'displayName');
        FInfo.Quota := TTMSFNCUtils.GetJSONDoubleValue(o, 'quotaBytesTotal');
        FInfo.QuotaUsed := TTMSFNCUtils.GetJSONDoubleValue(o, 'quotaBytesUsed');

      finally
        o.Free;
      end;
    end;
  end;

  DoGetSpaceUsage(FInfo, ARequestResult);
  DoGetCurrentAccount(FInfo, ARequestResult);
end;

Demo

Included in the release is a demo that allows you to test out each service individually in one easy and intuïtive overview. Click on the service of your choice and fill in your Application Client-ID, Secret and the appropriate Callback URL registered to your application. click on Authenticate and start exploring. The demo is available for FMX, VCL, WEB and LCL.

We want your feedback!

In this blog post, we already asked you for which service(s) you wish to see an implementation. We already received a lot of feedback, and want to thank you for this. This allows us to continue development in future updates of TMS FNC Cloud Pack. For those that didn't yet fill in the survey, please go to https://www.survio.com/survey/d/N4J9X1C8L4V7K1U7V

We want your feedback, so we can improve the TMS FNC Cloud Pack even more, so we want to ask you for a thorough testing on TMS FNC Cloud Pack and provide us with any feedback, comments, suggestions and issues you experience. This can be done via comments on this blog, or an email to support@tmssoftware.com

Video: Developing a web application with Google Charts (2/3)

$
0
0

After having created the service to retrieve the statistical information from the database and prepare it for our web application, we can develop the web application.

We will, of course, use TMS Web Core to develop the web application quickly and efficently. As we use a web service that is created with XData we can rely on the XData controls that are offered for TMS Web Core to develop using the RAD principle.

In detail, you will learn how to:

  • Create a new TMS Web Core application
  • Use non-visual data components to connect to XData
  • Use Google Maps component in a web application


Video: Adding user-interaction with drill-down/detail content from a database to a Google Chart web application (3/3)

$
0
0

The video series has taught us how to build a custom web service to deliver data to the web application showing a Google Chart. Displaying information is wonderful, but the chart shows only aggregated values. Any user of the application will have the desire to drill down into the data and not just see the sums and averages.

That is why this video will show you how to add user-interaction and query the database to show specific information:

You will learn how to:

  • Add interaction to your chart
  • Add a pop-up window that displays drill-down information, also requested from the web service
  • Specify XData Query operations

Here is a link to the video:


The Story of an intern at TMSSoftware

$
0
0

Hello, this is the intern speaking (or writing) about his experience at TMSSoftware. I’m a second year graduate student in programming-informatics who has been given the opportunity to do my internship here at TMSSoftware.

Getting started

My first week starting here was interesting as I had no real background experience in Delphi or Object Pascal, as the primary languages I learned at school were Java and C#. Thankfully, I had a lot of resources available, which includes the Object Pascal Handbook by Marcu Cantù. So getting started went smooth.

My internship was split up into three parts, were the first part was to study and test different REST services. The second part was based on implementing the APIs such as Google Translate and Microsoft Vision. The third part involved using the implementation in an application called TMS Vision.

TMS Vision should allow visually impaired people to be informed about their environment by simply tapping on their mobile phone and getting a spoken response in the native language. That response can be a series of keywords, or a short description on the object that has been recognized by the camera.

Used technologies

Doing my internship at TMSSoftware, I got access to the newest tools TMS had to offer. With the TMS FNC Cloud Pack I had the foundation to build a set of classes that implement the services needed to send and receive data via REST. For the GUI, I used FNC. For those not yet familiar with 'FNC' , these are what we call Framework Neutral Components. This means that these components can be simultaneously used with different frameworks, are fully cross platform, can be used from Delphi, C++Builder and Lazarus and most spectacularly can be used to create web applications with TMS WEB Core. Read more about FNC for the web here.

TMS FNC Controls can be simultaneously used on these frameworks:

TMS FNC Controls can be simultaneously used on these operating systems/browsers:

TMS FNC Controls can be simultaneously used on these IDE's:


Because TMS FNC Cloud Pack contains a core layer to handle asynchronous REST request, it became really easy to send and receive data.

Example of translating text via the Google Translate API. In the code below, the TTMSFNCSimpleCloudBase class allows you to quickly send and receive data via REST without OAuth 2.0 authentication flow requirements.
// form class private variables
private
  c: TTMSFNCSimpleCloudBase;
  target : string;

procedure TGoogleTranslateForm.Button1Click(Sender: TObject);
begin
  c.Request.Clear;
  c.Request.Host := 'https://translation.googleapis.com';
  c.Request.Path := '/language/translate/v2';
  c.Request.Query := 'q=' + TTMSFNCUtils.URLEncode(Edit1.Text) +'&format=text'+
   '&target=' + target + '&key=' + c.Authentication.Key;
  c.Request.Method := rmGET;
  c.ExecuteRequest(DoTranslate);
end;

Also parsing the request result data was very easy with TMS FNC Core, which exposes a set of ready to use functions for parsing JSON.
procedure TGoogleTranslateForm.DoGetList(const ARequestResult: TTMSFNCCloudBaseRequestResult);
var
  j, jd, ja, jav: TJSONValue;
  I: Integer;
  siso, sname: string;
  l: TLanguage;
begin
  lst.Clear;
  if ARequestResult.ResultString <> ''  then
  begin
    j := TTMSFNCUtils.ParseJSON(ARequestResult.ResultString);
    try
      jd := TTMSFNCUtils.GetJSONValue(j, 'data');
      if Assigned(jd) then
      begin
        ja := TTMSFNCUtils.GetJSONValue(jd, 'languages');
        if Assigned(ja) and (ja is TJSONArray) then
        begin
          for I := 0 to TTMSFNCUtils.GetJSONArraySize (ja as TJSONArray) - 1do
          begin
            jav := TTMSFNCUtils.GetJSONArrayItem(ja as TJSONArray, I);
            if Assigned(jav) then
            begin
              siso := TTMSFNCUtils.GetJSONProp(jav, 'language');
              sname := TTMSFNCUtils.GetJSONProp(jav, 'name');

(Code snippets were written for Google Translate in the first week of the internship) Here is an example to test the REST API for Google Translate.


Starting on components

After getting used to the different platforms, investigating and testing the various cloud services to be implemented in TMS Vision, I got started on transferring the sample code into components that work cross-platform. Doing the internship here, made this easy as the TMS FNC Cloud Pack already provided a solid base to work on, and additionally my colleagues were eager to lend their advice when I needed help.

Here is an example of how the final code looks with the Google Translate component.
procedure TGoogleTranslateForm.FormCreate(Sender: TObject);
begin
  c := TTMSFNCCloudGoogleTranslate.Create;
  TLanguage := TStringList.Create;
  c.Authentication.Key := 'My-API-Key';
  c.OnIsoLanguageList  := doLanguageList;
  c.GetSupportedLanguageList;
  c.OnTranslate := DoTranslate;
end;

procedure TGoogleTranslateForm.Button1Click(Sender: TObject);
begin
  if FTarget <> '' then 
    c.Translate(Edit1.Text, FTarget)
  else 
    c.Translate(Edit1.Text) ;
end;

This shows how compact your final code can be.

TMS Vision

I decided to use the knowledge I collected to make an application that works cross-framework and cross-platform to assist people who are visually impaired. The application allowed them to be informed about the environment around them. There were some critical parts in TMS Vision related to the Google Vision and Microsoft Vision APIs that involved uploading the picture taken from the camera. The data required by Google Vision, for example, needed to be in a base64 string. This was handled by the TTMSFNCUtils.FileToBase64 function included in TMS FNC Core. Below you can see a code snippet that uses this functionality to upload the picture data to Google Vision.

procedure TTMSFNCCustomCloudGoogleVision.AnalysePicture(const AFile: TTMSFNCUtilsFile);
var
 basestring :String;
begin
  try
    basestring := TTMSFNCUtils.FileToBase64(AFile);
    Request.Clear;
    Request.Host := Service.BaseURL;
    Request.Path := '/v1/images:annotate';
    Request.Method := rmPOST;
    Request.AddHeader('Content-Type','application/json; charset=utf-8');
    Request.Query := 'key='+Authentication.Key;
    Request.PostData := '{"requests": [{"image": {"content":"'+      
    basestring+'"}'+',"features": [{"type": "LABEL_DETECTION"},{"type":    
    "OBJECT_LOCALIZATION","maxResults": 5},{"type": "WEB_DETECTION"}]}]}' ;
    ExecuteRequest({$IFDEF LCLWEBLIB}@{$ENDIF}DoRequestAnalyse);
  finally
  end;
end;

Example of how the application looks now. The layout of the app has been created with the TMS FNC UI Pack, and runs on TMS WEB Core. The application is a PWA that is installable on the device.


CONCLUSION

Right now I'm in my second half of my internship and can say I enjoyed every moment of it, gaining access to the tools of TMSSoftware and the wide variety of FNC components, made programming in Delphi or Pascal a lot easier than I thought.

I’m still expanding my knowledge of Delphi and Object Pascal and I plan to expand the TMS Vision application with other API services such as Google speech to text to remove the need to interact with the screen manually by implementing voice commands.


Author: Brutin Bjorn


Why We Chose to Use TMS Components in AlignMix

$
0
0


Choosing which components to use in your application is an important decision that warrants careful consideration. Wrong decisions can be costly.

We’ve been using Delphi to develop applications since Delphi 1.0 back in 1995; and before that Turbo Pascal. All our applications help companies manage their sales teams. Over the years we’ve made mistakes when selecting component vendors. From these mistakes we’ve learned our lesson. When we started developing AlignMix, our flagship sales territory mapping application, we had a clear set of principles for choosing which components we’d use. To give you some background, AlignMix was launched in 2016 and now has over 5,000 users. It has a minimalist design, with strong focus on delivering a beautiful user experience for our corporate clients.

Here’s our guiding principles:

1. Avoid Freeware:

This one is a little controversial since many developers prefer open source over closed source. But in our experience the Delphi world is full of hobbyist who create great components, make it freeware, develop it for a few years and then move on as their priorities change. Even if the source is available, we don’t want to spend our time maintaining someone else’s code. It’s different if the project has a large community of developers, but this is rare in the world of Delphi.

2. Partner with Companies Who Are Committed to the Delphi Platform:

We prefer to choose component developers who are clearly committed to Delphi. We don’t want to use components from companies that only dabble with Delphi. We want a company where the leadership is always thinking about new ways to help the Delphi community. This is one area where TMS really shines. I don’t know of any component vendor that is more committed to the Delphi platform than TMS.

3. Look for Companies that Quickly Support New Versions of Delphi:

It’s frustrating when a shiny new version of Delphi is released but you’re not able to upgrade simply because a component vendor takes its time to support the new version. Once again TMS is brilliant at quickly supporting each new version of Delphi. As soon as a new version is released you can be sure TMS will almost immediately publish a timetable showing when each of their products will support the new version.

4. Minimize the Number of Component Vendors You Use:

If you follow principles 1 to 3, you’ll most likely end up choosing just a few component vendors. That’s what we’ve done. And we’re reluctant to add any more. Thankfully TMS has a comprehensive range of components that cover almost all our needs. Look at the screenshots to see how they are used in AlignMix. We trust Bruno and his team and will be working with them for the foreseeable future.


If you’d like to see AlignMix you can find out more on the website.

Author: Steve Maughan

Video: Google Maps with Style

$
0
0


Google Maps has become a very popular means to include mapping in business applications. In Delphi, we can use components from TMS Software that facilitate the use of the Google Maps API using Delphi components. Using the Google Maps API with these components is like using any other Delphi control.

The controls are available for:

  • VCL
  • FireMonkey (FMX)
  • Web (both TMS Web Core and IntraWeb)

Recently, Google introduced Map Styles. The style does not only refer to colors but also to content. You can define what is displayed and how. Further, the Google Maps API now comes with a “Night Style” for map display in dark user interfaces.

So far, TMS updated the VCL and FireMonkey controls to support styles. The following video instructs you how to:
  • Make use of pre-defined styles
  • Create your custom styles with the Google Style Designer
  • Use styles created by other Google Maps users


Video: Accessing any Delphi compatible database through a REST API using SQL

$
0
0

I have expressed this before, but Delphi is and will hopefully always be the number one programming language for database-driven applications. The architecture that has been there since Delphi 1 is still standing strong. Of course, there has been need for change to the database drivers, due to technological advances. However, at the inner core the classes TDataset and TDataSource as still standing strong.

Web Applications, multi-platform development, and mobile platforms make it necessary to introduce a layer in between the database and the application. Web Services producing JSON formatted data following the REST principle have become the pseudo-standard. As a side-note, REST is still not a standard and only a principle.

SQL is still the database query language that developers feel most comfortable with. The Web Service Layer introduces an insurmountable challenge for many. Thus, there are more frameworks than sand at the beach to facilitate the process. TMS Software offers a straightforward, affordable solution if you need to build a Web Service API with JSON called XData. If you look for performance, no need for JSON and a quick way to migrate your database project use RemoteDB from TMS instead.

For the case that you need a REST API with JSON support, I recorded the following video. It teaches you how to hook up any database supported by Delphi to the web service. You will then be able to offer any SQL query as a result for the web service. Further, you can even use parameters.

Stay tuned for more video content about RemoteDB. An even quicker and more efficient solution to provide abstract database support to your client applications. Abstract database support means in this case that the client is unaware which database you use and also will not need the database driver technology to access the data.

The video will explain step-by-step how to:

  • Create a web service with XData
  • Add the database connection to a FireDAC database
  • Add the database query
  • Add a service for the SQL queries
  • Write a VCL Forms client that displays the data
Be aware of the fact that the client will not need any XData-specific components.


Errata

The VCL client actually does not need to create the TStream instance as the XData framework does that. Thus, the correct client-side code is this:

LStream := LService.GetSchools as TMemoryStream

There is no need to do anything else with LStream.

TDbAdvGrid: Common mistake when adding records using the grid

$
0
0

There are always subtle differences when you compare the standard VCL components to their much more feature-rich counterparts from profressional component sets.

When you start using TDBAdvGrid in your database projects you will definitely run into the “issue” that will I describe here. The biggest annoyance when encountering this is that you basically will start looking for a fix to the problem in the wrong place as you never expect the issue to be related to the setup of the visual component.

My form setup is pretty simple: VCL application. I have two visual grid components hooked up to the same TDatasource, which is connected to a TFDQuery.

TDBAdvGrid from TMSSoftware on top, TDBGrid on the bottom.


The data being edited is also quite simple: An item number is associated with a pack name and a theme name. The values for the combo box are being pulled from yet other queries (lookup fields), but this is not to be the focus of this post.


Compiling this for the first time will immediately yield different results. You will be able to enter data in the TDBGrid. Furthermore, you will be able to add more records to the already existing list, i.e. append and edit operations are both enabled by default. However, this is a very easy fix. TDBGrid behaves according to the TDatasource which is set to AutoEdit by default. Thus, the user may edit and append.

TDBAdvgrid introduces another level that can be configured. In order to be able to edit the dataset, you need to set “goEditing” of the “Options” property to “true”:


If you restart the app now, you will be able to edit the already existing values in the TDBAdvgrid. Still, you will not be able to add any values. Yes, you may bring a TDBNavigator or similar component into the mix. But entering values is supposed to be quick and efficient for the user. He needs to be able to keep his focus on the grid. Thus, we find in the “Navigation” property the setting “AppendOnArrowDown”. Perfect, exactly what we need.


Done. … or are we?

If you try to append a value at this point, the grid will offer a new row to enter values:


Entering “71220” is possible, but in no way you will be able to select anything else. As soon as you leave the cell, the row “disappears”. It also does not show up in the second grid as an incomplete record. It simply disappears.

If you are like me, you question your setup of the query, datasource and connection immediately. Is the query set up correctly to post the values correctly? Due to the fact that I had lookup fields involved, I started checking those as well. Of course, I realized that the underlying DBMS does not accept tuples that lack the association to pack and theme. This is all correct, but why does the component not allow me to make the selection first?

To make things worse, I did not have the luxury of a TDBGrid on the same page when I implemented this. That was the n-th step for me to see what was going on. As soon as I realized that things turned bad as soon as the cell in the TDBAdvGrid was left, I remembered.

Quote from the developer guide:
TDBAdvGrid can perform editing in two modes. This is selected by the property DBAdvGrid.EditPostMode. When this is set to epCell, this means that the value that has been edited is posted immediately to the database when a cell leaves inplace editing. When DBAdvGrid.EditPostMode is set to epRow, this means that a Post will only happen when all cells in a row have been edited and the user moves to another row. Typically, for tables with various required fields, the epRow setting is the preferred setting.


The non-default behavior is exactly what I need in my case. I need the row to be posted when all the fields have been entered.


So, I changed the property EditPostMode to ‘epRow’. And … all worked as I wanted it to work in the first place.

As a general rule when working with visual components that are linked to database queries or tables, it is always good to be aware of the effects the visual component and the associated user interaction with that component might have on the underlying dataset.

This is a very good example where flexibility and comfort require some additional thought how to configure the post operation. I am really struggling not to link to the obvious Spiderman quote here….

(For anyone wondering what the sample data refers to: it refers to available LEGO Dimension character and item packs…)

More service than ever for Delphi development with TMS certified consulting partners

$
0
0

Over the past couple of years, it has become clear to us that for many individual software developers and in many companies where Delphi is used as the main software development tool, the challenges have not become easier:

  • It is not easy to find software developers, let alone good Delphi developers
  • Where Windows knowledgde was fine 10 years ago, these days knowledge of macOS, iOS, Linux, Android, web technologies is mandatory to be relevant
  • Architectures are shifting towards microservices based backends, use of push notifications etc...
  • There are more highly complex libraries, SDKs, REST services, components than ever to choose from
  • ...

It has always been the goal of TMS software from our first days to deliver easy to use software components that take out a lot of deep technical challenges out of software development and allowing our users to focus on the business logic. While we also always aim to deliver fast & professional support services for our components, the needs of our customers also often exceed what regular product based support can offer. We see more and more customers wanting:

  • Assistance in setting up new architectures
  • Outsourcing specific component integrations or entire project developments
  • On-site training & consulting
  • Migrations of existing projects to unicode, cross-platform or web
  • Temporarily extra resources for projects
  • Help in getting started entirely new web projects with TMS WEB Core and/or FNC components
  • - ...


Therefore, we've started our network of TMS certified consulting partners. These are partner companies we know, have a long term relationship with and that we know have deep and expert level knowledge in Delphi and our TMS software component products. Important is the presence of these partners in the same time-zone, speaking the same language, directly reachable by phone or in the office.

We have created a special landing page for our partners where you can find a partner nearby. With this launch, we can already present 5 TMS certified consulting partners in 3 continents: FlixEngineering in the USA (English), our branch in Brazil for South America (Portuguese & English), C-Quel for the Benelux (Dutch, French, English), Kassebaum Engineering for Germany, Swiss, Austria (German, English) and Softacom for entire Europe (English, Russian). We have added the areas of expertise of our different consulting partners on the landing page. While our consulting partners have expert level knowledge in Delphi and our components, there is also a direct line and close collaboration with our development team. So, our partners are always backed by our component development team and have an insight in our internal developments, upcoming products, ... so the partners can at all times make the best possible & well-informed decisions for helping Delphi users.

Visit the partners landing page for more information and details!

We also plan for extending our network of consulting partners in the coming months and years. Especially in the areas of Asia, Australia, South Europe, South Africa where there is also a lot of Delphi development with TMS components going on. If your organisation is interested in becoming such partner, feel free to reach out & discuss.

One thing is clear, as a Delphi developer working with TMS components, you are never alone. Your projects with Delphi and TMS components are guaranteed for success with our team that is always ready for excellent component specific support via email or our forums and our partners offering a wide range of services beyond this.

Viewing all 1016 articles
Browse latest View live


<script src="https://jsc.adskeeper.com/r/s/rssing.com.1596347.js" async> </script>