
Motivation.
Why would someone want to do such a thing? Well, much of the focus on Raspberry Pi is related to the ultra-low-cost and all-inclusive nature of its design. But sometimes it helps to give it a bit more power, particularly when doing a lot of testing. While the ultimate product might still be a low-cost Raspberry Pi, new development and testing don't necessarily have to be constrained by the same environment.Raspberry Pi Upgrades.
Specifically, I'm looking at trying to make improvements to disk performance and to WiFi
performance. While I appreciate very much the low price point that Raspberry Pi is targeting, I'm also curious
about how much better it can be with a few small tweaks. But first, we'll need some baseline data so we can
determine whether anything has improved.For disk performance, I'm using the microSD card that came preloaded with my Raspberry Pi OS order. The card in question turns out to be a SanDisk Ultra 32GB microSD card (SDSQUNB-032G-GN3MN) which, as near as I can tell, has a rated at 48 MB/s max read speed and 10 MB/s max write speed. To get some actual numbers, the following script was used.
#/bin/bash
dd if=/dev/zero of=./speedTestFile bs=20M count=5 oflag=direct
dd if=./speedTestFile of=/dev/zero bs=20M count=5 oflag=dsync
rm ./speedTestFile
This consistently reported about 20 MB/s write speed and 45 MB/s read speed. Not the worst, but not the best. As the plan is to do lots of development, a little more room might also be beneficial, as it is already half-full just with the operating system. Let's try something a little more substantial - a USB3-connected Samsung SSD 980 500 MB NVMe M.2 SSD. It has a reported read/write speed of 3500/3000 MB/s, likely well beyond anything the Raspberry Pi can cope with, but should be fun either way. Moving the Raspberry Pi microSD contents over to the SSD so we can boot from it without the microSD card can be accomplished using the SD Card Copier utility that is included in the Accessories menu. The USB device was detected automatically when it was plugged in, and it didn't take very long to copy over to the SSD.
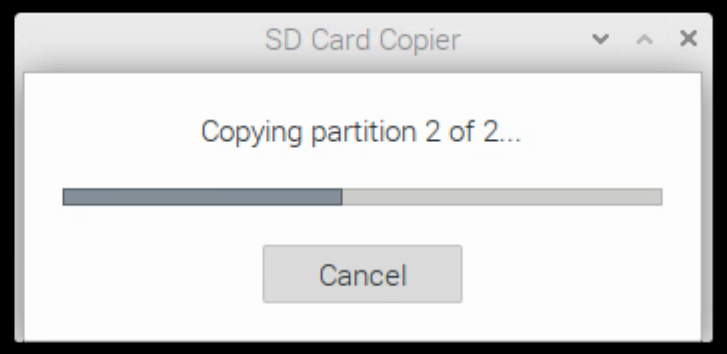
Copy microSD partitions to SSD
Once the copy was complete, shutting down the Raspberry Pi, removing the microSD card, and booting the Raspberry Pi, we're in business. Didn't have to fiddle with bootloader settings or anything. Available free space went from 50% to 97%. As for performance, our test script now reports about 200 MB/s write speed and about 240 MB/s read speed. Quite a step up! If minimizing boot times is your thing, you might have to look elsewhere as boot times are still in the 25-30s range, booting with either the microSD card or the SSD. But nothing has been done in that regard - splash screen and all other defaults haven't been changed.
As far as WiFi is concerned, there was no issue connecting to my WiFi router originally, and it does indeed work. However, it isn't very speedy. Using speedtest.net, my regular desktop reports around 900 Mbps (wired connection), and an original and aging iPad Pro (9.7") reports around 400 Mbps. Raspberry Pi comes in at around 80 Mbps. To try and address this, let's give a BrosTrend AC1200 Wireless Dual-Band USB3 Adapter a try. Unlike the SSD, this device wasn't automatically recognized, and installing new drivers in any Linux system is likely to be a headache. Less so in this case, because we already have a working internet connection. It comes with a mini-CD with the drivers on it, but that's a little bit antiquated. Can't even recall the last time I used a regular CD, much less one of these! In any event, the pamphlet that comes with it points to a website with the necessary command. This downloads the drivers, all the Linux dependencies for headers, and the rest of what is needed to rebuild the kernel (?!).
sh -c 'wget deb.trendtechcn.com/install -O /tmp/install && sh /tmp/install'
Once complete, the onboard WiFi can be disabled as follows.
echo "dtoverlay=disable-wifi" | sudo tee -a /boot/config.txt
It did take quite a while to run (longer than copying the microSD card, who knows how long it would have taken if we hadn't done that first!) but when complete, our new network adapter was available. Speeds are now around 170 Mbps. So certainly
an improvement. Whether that is enough to justify the extra expense depends on how much your work relies on
network performance. Interestingly, perhaps, a wired connection to the Raspberry Pi only gets around 210 Mbps.
Curiously, I had recorded before/after videos showing the https://www.actorious.com
page loading - lots of network activity, a fair amount of data, etc. But the videos ended up looking nearly
identical, after both updates. Seems that the issue there is more to do with Raspberry Pi's lower-powered CPU than anything else.
And finally, just a note about the cost. The cost of the Raspberry Pi board itself (about $60 CAD) was just slightly
more than the new WiFi adapter (about $40 CAD), and around half the cost of the new SSD ($75) and its M.2 - USB3
adapter ($40 CAD) combined This is not likely something you'd spend when deploying a Raspberry Pi in a kiosk
environment or anywhere else really, as once your app is up and running, these won't make much difference anyway,
most of the time. There are also large capacity and speedy microSD cards that can be found for far less
money and with ultimately the same level of performance. It might be that the onboard WiFi adapter could be further tweaked to get a little better performance. Something that would be worthwhile if deploying a number of these at the same time. In general, though, it seems the Raspberry
Pi is just lacking in raw horsepower to get beyond these numbers. Not a criticism in any way whatsoever - hard to complain about a $60 computer when it does include all of this stuff anyway, just not the top-end version of everything, which is expected.
Player Project - Visualizer.
So now that we're all set up, let's try something fun. In the Web Audio API post, we developed an app that had a visualizer. And the latest Raspberry Pi 4 (or 400) supports dual HDMI displays. So wouldn't it be fun to connect a second display just for the visualizer? Kind of a proof of concept at the moment, but a 7" 1280x400 display (including capacitance touch) can be found for around $100 CAD. It has an HDMI connector, a power and a touch USB connector, standoffs for mounting, various cable connectors and adapters (right angle adapters for example) if you want to be more creative in how it is mounted, and surprisingly no documentation of any kind. There are a couple of buttons on the back, for on/off and changing the touch orientation. By default, it is set to display in a vertical orientation, but the Raspberry Pi's Preferences/Screen Configuration app can be used to change the orientation.After connecting a new WiFi adapter and the external SSD, this was a bit too much for the Raspberry Pi power system, so the display had to be connected to an external power supply (just via a USB dongle, no special wiring). The Raspberry Pi is plenty capable enough to display an even higher resolution visualizer. Here's a quick video of what it looks like.
Full-Screen Visualizer Video
In a future post, we'll have a look at what else we can do with this display. Should be possible to have the
Raspberry Pi boot and display this app - maybe with a few more tweaks for more of a jukebox-like interface. Nothing else
is required! Something similar could be done for implementing a "smart photo frame" or for displaying any other kind
of diagnostic information, or data from Raspberry Pi's sensors. So much yet to explore.


.jpeg)
